
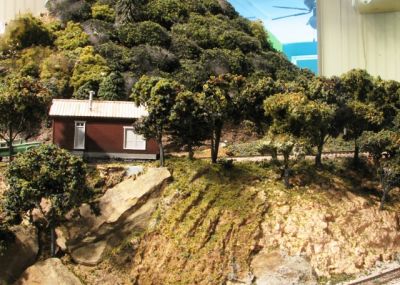
Modeling an Appalachian coal hauler means lots of hoppers, lots of mountains, and of course, lots of trees. There are many commercial tree products available, some are economical, some provide beautiful tree models. Typically, both ideas don't come in the same package. Here is one approach I've taken to provide a realistic forest for my trains to run through. It's an inexpensive process for making your own nicely detailed trees using materials you can easily get your hands on. Look below for my methods for making the ubiquitous "puff ball" trees for backgrounds and distant hills.

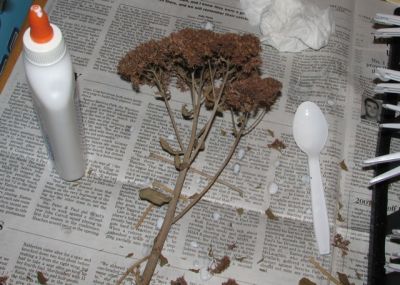
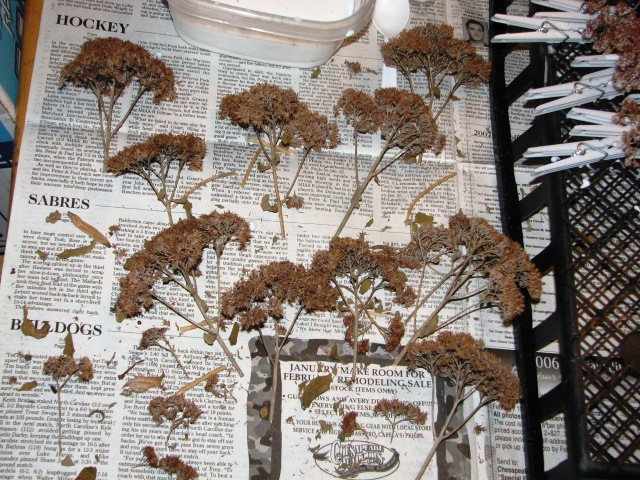
In searching for the perfect tree armature, I had to look no further than my own back yard. We have several Red Sedum plants growing around the house, which produce a nice umbrella-shaped flower with lots of tiny stems underneath it that hold the seed pods. The flowers bloom on top of long stems, and in the fall, they turn a dark red-brown as they dry out. Each fall, I go out and snatch up the blooms, then leave them in the garage for a few months to fully dry out. By January or so, I have a whole pile of blooms that look like this:
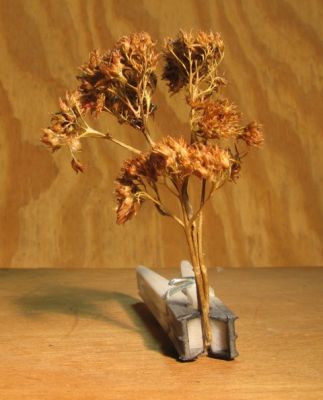
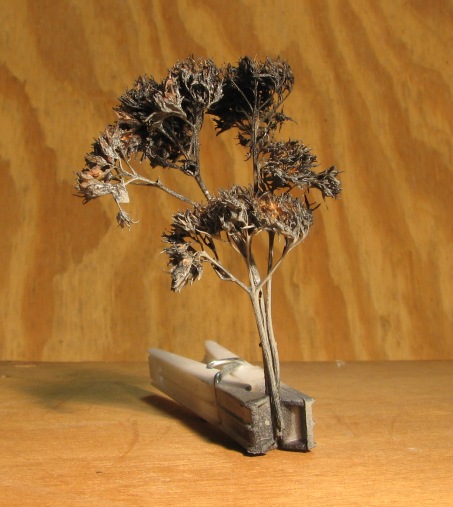
A finished tree armature. You can see how combining different stems creates a more 3-dimensional, realistic scale tree.
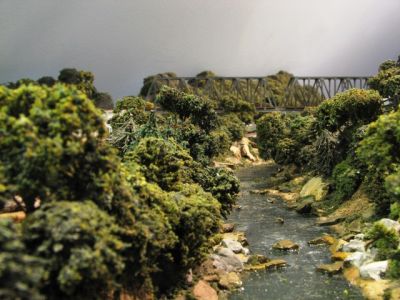
Clustered in groups or individually, the Sedum-based trees look great, and cost next to nothing! Working a couple hours at a time over three days, I easily made 100 trees.

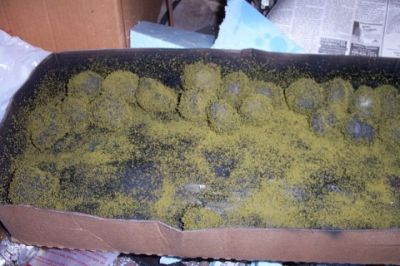
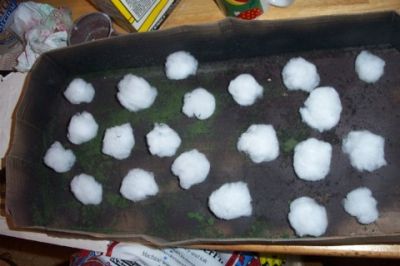
To do the puff balls, you need a package of poly fiber, you can get this at Walmart back in the fabric section. Costs about a buck for a metric tonne.
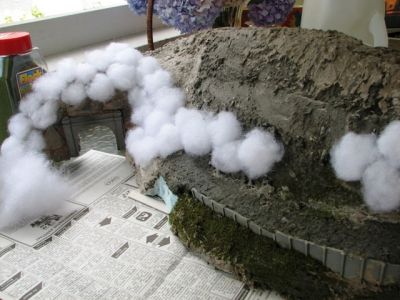
Separate small clumps, about 1" in diameter, and roll them up in your hand. Then glue them to the scenery base with white glue, or whatever sticky stuff you have laying around. Liquid nails is pretty good for this, since it's tacky right away.
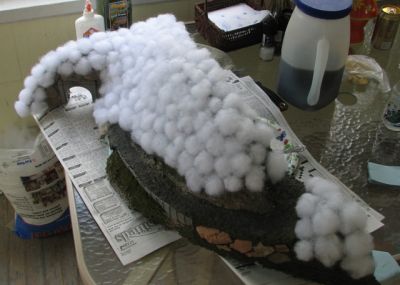
Cover your area with same, allowing some room in the front for the "real trees" described above.
NOTE: This next step should be done in a well ventilated area.

Get a big can of cheap flat black spray paint. Give the puff balls a generous coating. When you've saturated the area adequately (so that you don't see any white) start sprinkling on some fine green ground foam. It's good to have a couple of shades of green handy to mix things up a bit. If you're planning to do fall foliage, start with the black, then spray some grey primer over it to lighten up the "branches". Then randomly sprinkle on you browns, reds and yellow, leaving some of the grey puff balls visible.
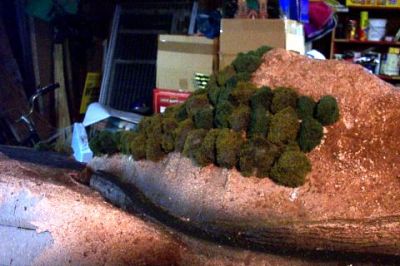
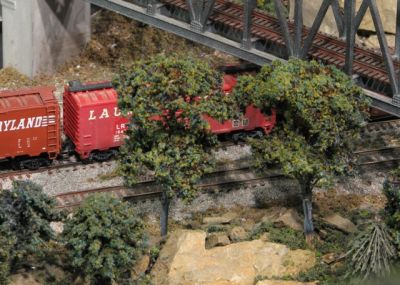
When it's done, apply some of the nicer looking trees with trunks along the front edge, and blend some more ground foam in to make the transition.
If you can't tote the layout outside, or remove the section you're working on, follow the same procedure, only put the puff balls in a soda flat and spray and sprinkle out in the garage. When they dry, you can cut each puff in half, making two puff "domes" and glue the flat side to the scenery base. Two trees for the price of one!
This is a quick and affordable way to get some greenery on your layout.
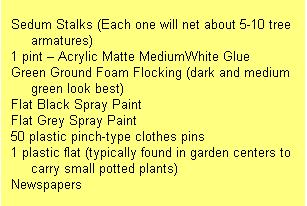
Bill of Materials
While the branch detail is pretty good by itself, the overall shape of the bloom isn't quite right for making N scale trees. The first thing to do is to separate the bloom into individual stems, each with a smaller cluster of seed pods at the top. Leave the seed pods in place, they will form the bulk of the foliage, which saves on the amount of ground foam needed to "green up" the tree at the end.
1. First separate the stems. Combine various stems to create the tree armature, glue the stems together, then pinch them together to set with the clothes pin. It's important to use a plastic clothes pin. The glue would end up bonding to a wood clothes pin... Don't ask me how I found this out...
2.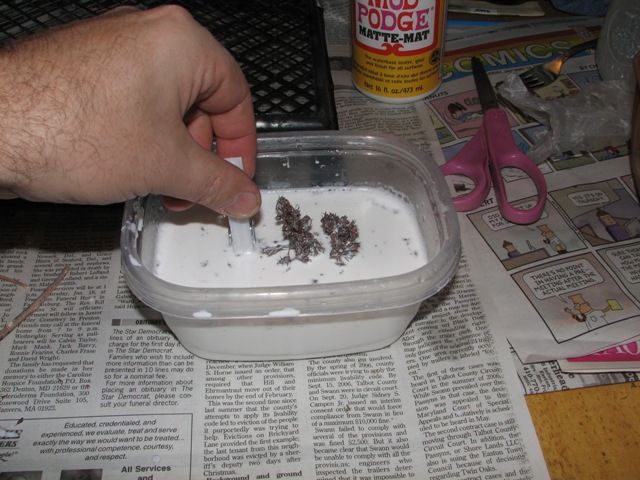 Once the armature is glued together, dip the assembly into a 50/50 solution of acrylic matte medium and water. Make sure you cover the entire armature, seed pods and all. This will help make the stems more flexible, and sturdier for the rest of the tree-making process and installation on the layout. The glue can be wet for this process. The clothes pin makes a convenient handle, as well as keeping everything together while it dries.
3.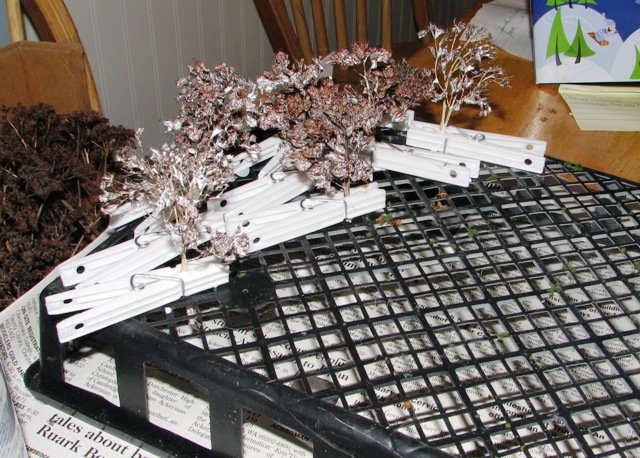 Set the assembled and dunked tree armature on the drying rack. This is the plastic flower pot flat turned top side down over the newspaper. The excess matte medium will run, so you need to protect your work table. Leave the trees on the drying rack over night, and they'll be nice and solid in the morning.
4.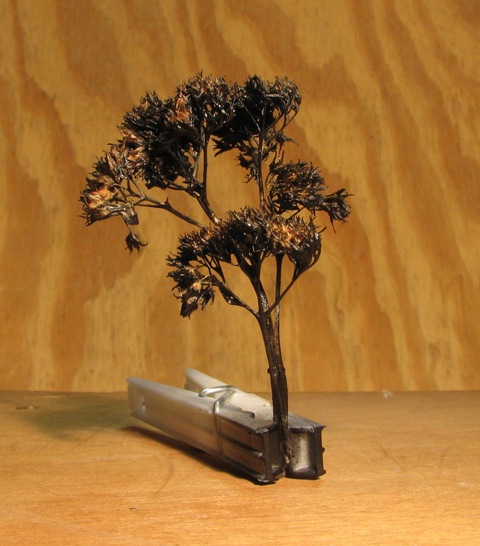 Once the armature is thoroughly dry, spray a coat of flat black on the trunk and branches, as well as on the top of the crown of seed pods. This gives you the shadows and texture you'll want, and darkens the crown so you don't have to use as much green stuff.
5. Now spray a mist of grey over the stem and branches from the bottom. This gives you the finish bark color and highlights, but still allows the black to show through for shadows and texture. Leave the crown darker. These will dry pretty quickly, so we're ready to add the foliage.
6. I transferred the remaining matte medium solution into a mason jar so I could dunk just the crown of each armiture into it. After shaking off the excess, I sprinkled on the flocking. I used Scenic Express fine medium and dark green. Try to avoid getting too much onto the upper stems to allow the bark color to remain visible.
7. Apply the foliage over a container so you can recycle the excess for other projects. Use the clothes pin for a handle to keep from getting too much gunk on your hands. Remove the clothes pin, and set the finished tree back into the drying rack. Let it dry again over night, and you'll be ready to install trees in the morning!
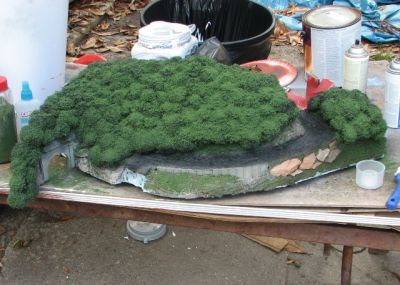
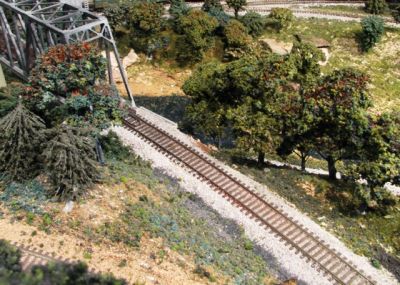
Extruded foam scenery really has an advantage in that you can build it in lightweight sections, then remove those sections to go outside to do the messy, smelly stuff like spraying paint and sprinkling ground foam.
When you bring it back in and set it in place, it really brings the scene to life quickly.